Building and installing functional shutters for storm protection, privacy, or just to enhance the appearance of your home doesn’t have to be an overwhelming project. Plenty of examples of historic shutters were simple home-made affairs that required little in the way of tools and woodworking skills, but those shutters have proven functional for a century or more…. simple works for me.
Internet instructions that I’ve seen give the impression that their approach to the shutters and hardware to hang them has been more complicated than necessary. The following example is based on the most common shutter installation situation. We used the simplest shutter construction coupled with hardware designed to easily install board and batten shutters.
 |
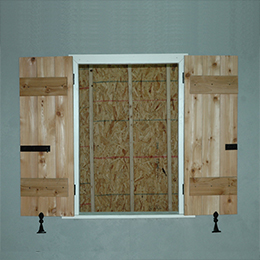 |
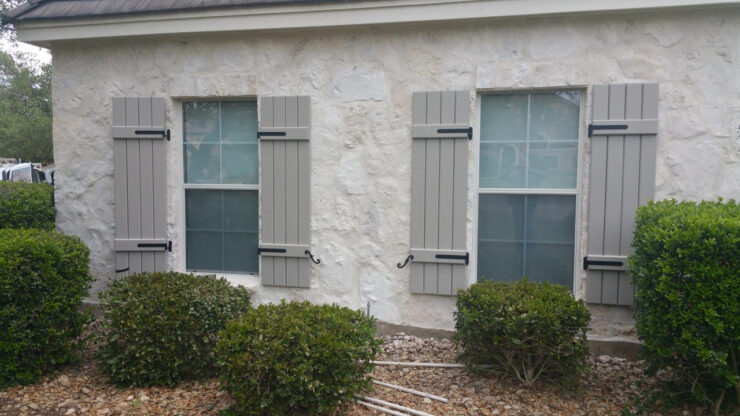
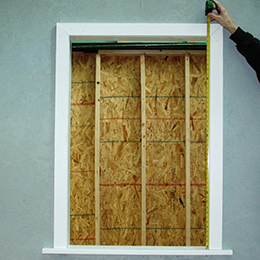
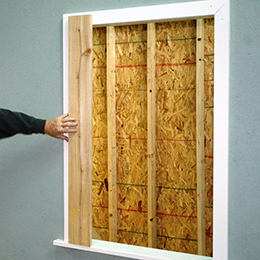
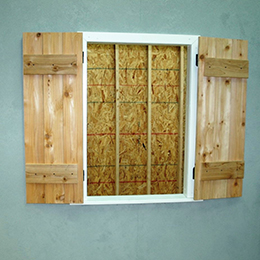
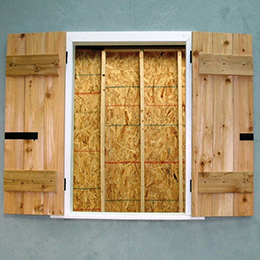
| We built a wall with a typically sized window opening. A three inch frame surrounds the opening. This situation is typical on frame construction and reflects masonry construction where windows are recessed within the opening. The goal is to make and install functional shutters for storm protection on the window. | Shutters made from 5/4 x 6” cedar boards available at home centers. The hardware is from Brandywine Forge, with hinges and pintles designed to easily install board and batten shutters. This approach works equally well with windows recessed in a masonry opening or installed flush within a frame wall with surrounding trim. |
The first thing with this or any other installation is to determine the most appropriate way to locate the shutters relative to the window. Then decide what hardware will work best. Looking at our installation options page, what we have here is a window installed flush with the exterior of the structure and shutters that mount “proud” (outside of) the window frame.
This is a simple approach that is easy to install and particularly attractive when storm/screens have been installed on the face of the window. I chose to show this installation because it doesn’t require shutters made to tight dimensions and it positions the closed shutters to be braced by the building, providing maximum security against storm winds.
Situation FP, frame construction with shutters mounted “proud” on the casing
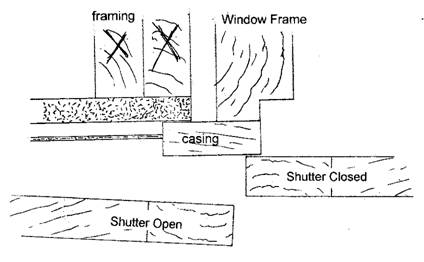
The early New England approach. The shutters mount proud on the casing with the top and sides of the shutters resting against the window casing. The structure braces three sides of the shutters against storm winds, they can’t be pushed back into the window opening. With the proper hardware, it’s the easiest way to install functional shutters on the most common windows.
Building Functional Board & Batten Shutters
Having decided on the installation approach, selecting the best hardware for the installation is next. Having thoroughly researched the historic as well as the hardware that’s currently available and, finding nothing appropriate, I figured there had to be a better way to hang board & battens – so I made my own hardware. The good news is I made a bunch, so you don’t have to make your own. This example uses our #409 board & batten hinges, very simple to install.
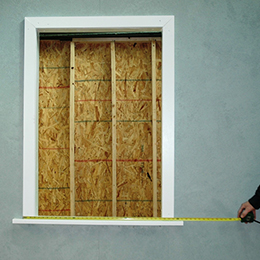
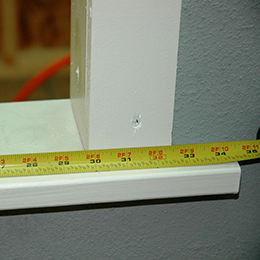
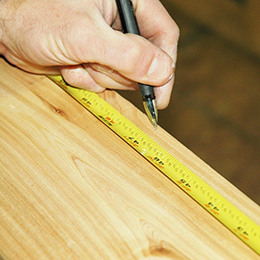
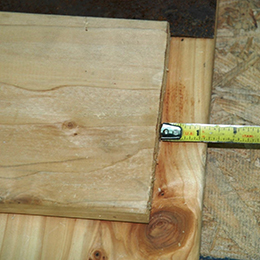
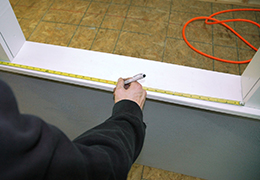
First, we measured the inside width and height of the opening. We’ll use this dimension to figure out the size of the shutters – they’ll want to be a bit wider and higher than the opening.
 |
 |
 |
 |
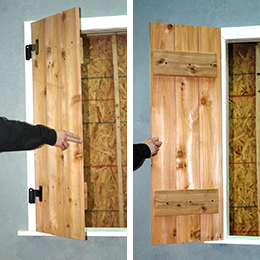
| We measured the width of a stock 5/4 x 6” cedar board. Cedar seemed a good idea just because shutter makers are very proud of the fact that they use cedar plus it is light weight and not terribly expensive. | We want each shutter to over-lap the edges by about an inch. Opening 30” width, half of that per shutter plus 1” overlap equals 16” shutter width. Three stock boards worked just right. If we needed to rip a narrow board it would have gone between full boards on the outside edges. |
 |
 |
 |
 |
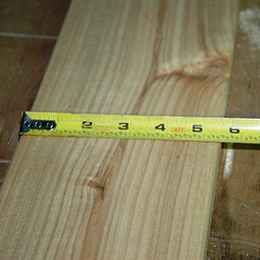
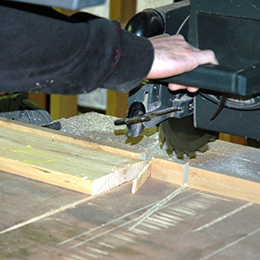
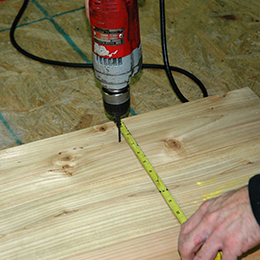
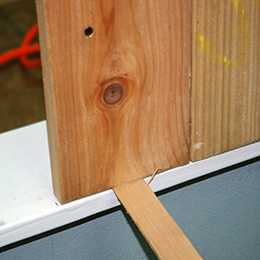
| We figured about a two inch overlap on the top, measured and cut a single board. | Then verified that it fit like we figured. Blacksmiths don’t like wood – doesn’t weld. |
 |
 |
 |
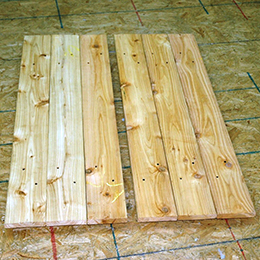 |
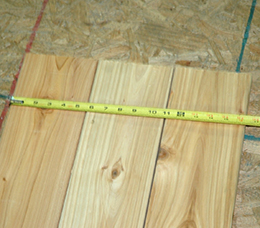
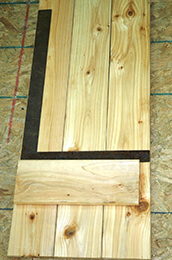
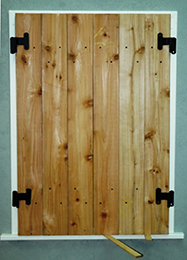
| We used the same boards to make the battens. The battens will rest inside the window case and the vertical boards will close outside of and resting against the casing. Each batten is 1” shorter than the full shutter width to expose the 1” of vertical board that will abut the case. The battens were positioned at a height that looked comfortable – about 6” in from top/bottom. | When both battens were positioned and squared on one shutter, we carefully laid the three boards of the second shutter on top. We then inserted deck screws from the top down into the battens. That way no screws showing on the battens when open. Two screws per board for rigidity, staggered pattern for looks.
Repeat for second shutter. |
Installing Functional Board & Batten Shutters

And the good news is we already know how the shutters will fit the opening and what hinges we’re going to use. Getting the right approach and stuff is the hard part.
Three parts to the hardware:
- Hinges & pintles to hang and swing the shutters
- A lock to keep them closed
- Hold-opens to keep them from banging in the wind
Installing Functional Shutter Hinges & Pintles
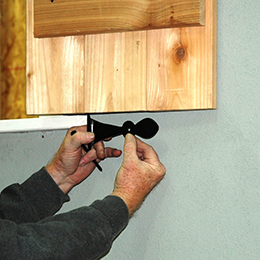
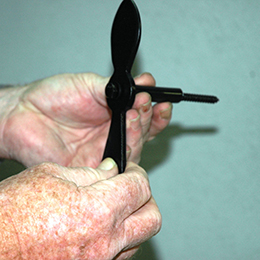
As noted, we’re using our Brandywine Board & batten hinges and pintles, item #406. These hinges surface mount on the face of the shutters and are contemporary in design. If you want to go with a strap hinge look, you could use #410 – the Philadelphia Strap hinge. If you have larger, heavier shutters you may want to consider any of #700 series strap hinges mated with #304 pintle. All of those hinges install the same way as these.
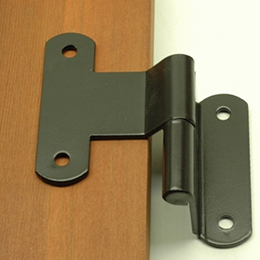
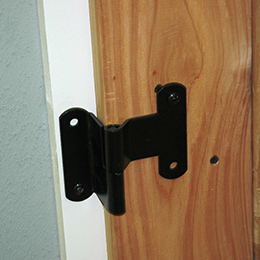
As with all historic shutter hinges, board & batten hardware is made as “lift-off” hinges. The pintle attaches to the building with a vertical pin while the hinge has a female barrel. The male & female parts are of equal heights and meet in the middle.
It is a simple matter to lift the shutters and their attached hinges from the pintle to do maintenance.
In looking at historic structures you’ll often see the shutter pintles painted white to match the structure and the hinges painted dark green to match the shutters. Makes sense, the pintles stayed attached so got painted the same color as the windows – the shutters got painted down on the ground so the hinges hooked to them got the same paint at the same time.
 |
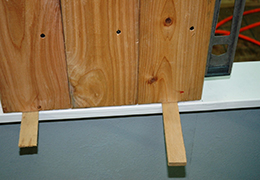 |
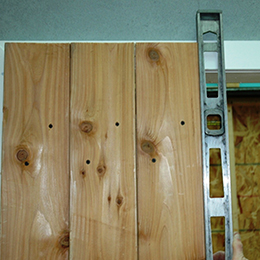
| First we lightly marked the mid-point of the windows where the two shutters will meet. | The first shutter was positioned in place resting on the window sill. Shims located under the shutter define clearance for the shutter to swing open. |
 |
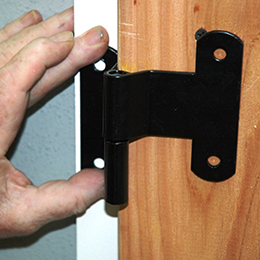 |
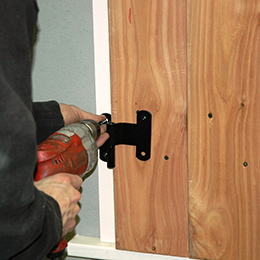
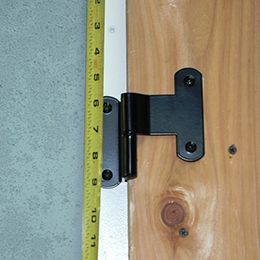
| Verify that the shutter is plumb. The shims can be driven in or out to square up the shutter. | We positioned the assembled hinge and pintle with the hinge resting on the shutter and the pintle on the casing. |
 |
 |
| One screw was inserted into the pintle, one on the hinge. The bottom set of hinges and pintles were installed the same way, using just one screw on hinge and pintle. | Next we remove the shims and verify the hinges swing properly. If adjustment needed, re-shim the shutter, remove one screw, adjust the hardware and insert screw into remaining screw hole and fresh wood beneath. Re-test. |
 |
 |
| Insert the remaining screws in the top and bottom hinge and pintle. | Position the second shutter in the opening based on the original mid-line mark. Shim the shutter as before. |
 |
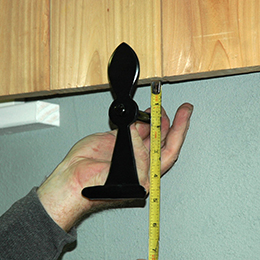
 |
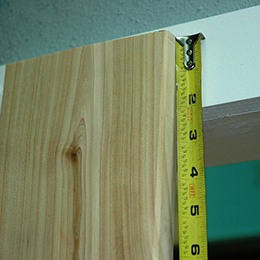
| Measure the distance from the trim to the top of the first hardware set. | Locate and install hinges and pintles on the second shutter so they match the height of the first set. |
 |
 |
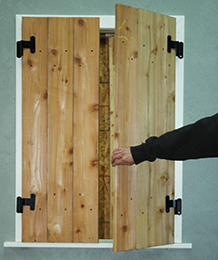
| Verify function of second shutter and install remaining fasteners in that hardware. | Done. It took two guys about 15 minutes to install the hardware. But we set it up to be easy and worked on the floor. |
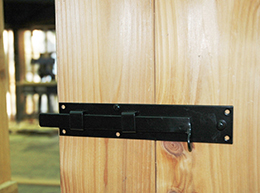
Installing Functional Shutter Locks
Done – yeah, right. Done hanging the shutters, which is only the first of the three hardware elements in shutters. Now the shutters swing from open to closed, but they still don’t lock in the closed position or have anything to hold them open and not just banging in the wind.
First the locking thing…. We used our standard 610 shutter bolt, the most common early pattern.
 |
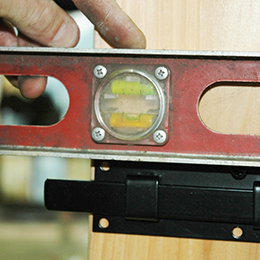 |
| From inside, position the lock at a height that can be easily reached through an open window. | Install one fastener in the middle of the lock to hold it in position then level & insert additional screws. |
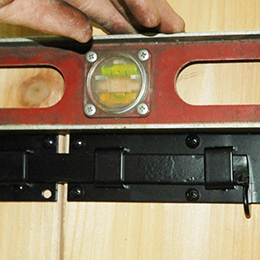 |
 |
| Close the second shutter, slide the bolt to the locked position and position the keeper on the extended bolt. Level and install screws in keeper. | Now your shutters swing from open to closed and lock shut. Almost done. Nice thing about shutter locks, you see them when the shutters are open. |
Installing Functional Shutter Hold-opens
To keep the shutters open. You can use long hooks or shutter dogs (some call them tiebacks). What’s right? Whatever works with your installation and makes you happy.
Sometimes sill mounts with shutter dogs work – like if you have a random stone exterior. Clapboards almost always require plate mounts to insure you get into sound structural material to secure the dogs and shutters. Long hooks are a great option but they require a pretty substantial sill to anchor them.
I chose tiebacks for this example because they’re most typical and they give you visual options in dressing up your shutters and the exterior of your home. I went with our #805 Belmont because it’s a nice looking form with early historic roots and it’s not the typical “S” shape you can find in a hardware store.
Where on the shutter does the shutter dog go? Historic examples show dogs mounted across the full bottom edge of the shutter, or at the outside of the shutter about mid-point – just depends on the installation and what works. Typically the dogs are located from ½ to 2/3 of the way across the bottom of the shutter. With lag screws as we used, location of studs has a lot to do with where.
The real critical dimension is how far below the edge of the shutters the dogs are installed. They must be high enough to firmly engage the shutters in the open position, but low enough for the shutter to clear the tieback when it is rotated to the horizontal position to allow the shutter to be swung closed.
Position shutter dog below the shutter in the horizontal position so that the shutter will freely swing past the dog and note the distance from the shutter.
 We’ve assembled the Brandywine Forge lag screw installation kit with the shutter dog. The Brandywine lag kit includes our unique polyurethane “stand-off” sleeve. The sleeve covers the lag threads on the back of the dog and presses against the back of the dog and the structure as the lag is screwed in. The stand-off tube is compressible, so you can crank down until the dog is resting against the face of the shutter to eliminate rattle. Each shutter can be installed so it rests against the structure, compensating for differences in the wall to which the shutter is installed.
Duplicating the established distance from the shutter – all that remains is to drill a pilot hole and install the lag screw. For brick or masonry, a lag shield would be installed to accept the screw.
If you need more information on how to install a functional board and batten shutter, make sure to watch the following video: